Docker Compose PostgreSQL Master/Slave Failover (HAProxy + PgBouncer) — Database Setup Walkthrough
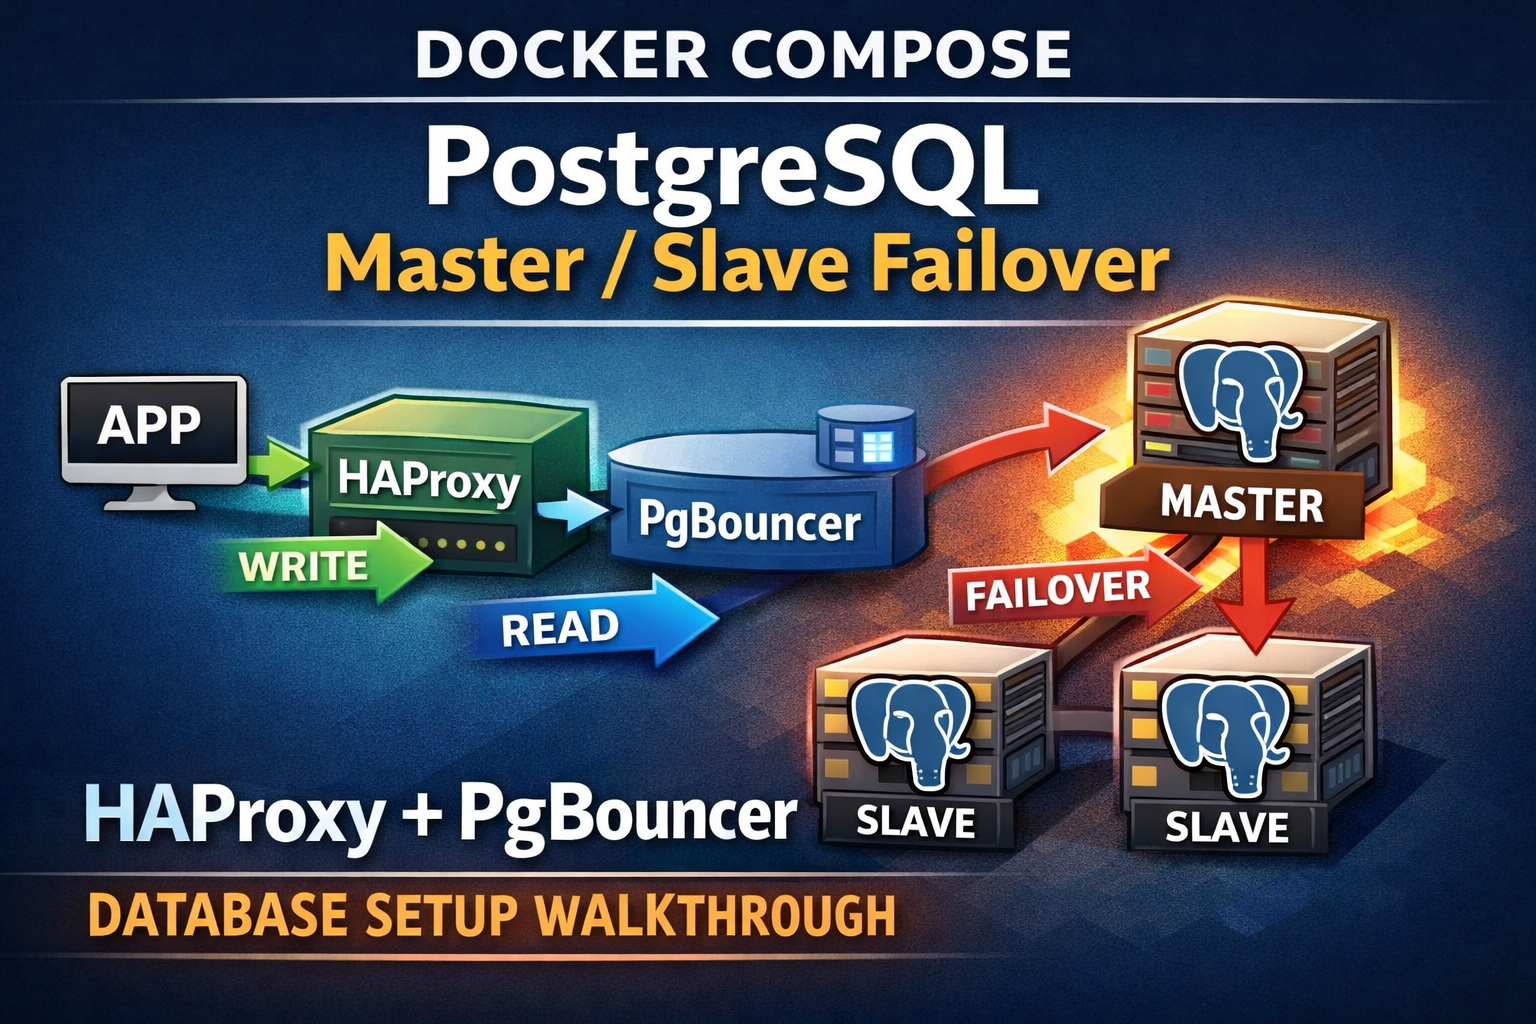
This article explains a Docker Compose database setup that runs multiple PostgreSQL nodes behind HAProxy and PgBouncer, giving your application a single stable database endpoint and a foundation for implementing primary/replica failover.
📦 GitHub Repository
You can find the full working example here:
https://github.com/jobissjo/fail-over-project/tree/manual-failover
Project structure:
docker-compose.yml
haproxy/haproxy.cfg
pgbouncer/pgbouncer.ini
pgbouncer/userlist.txt
primary/init.sql1) What are we building?
Goals
- Provide a single database endpoint for applications.
- Add connection pooling to protect PostgreSQL from excessive connections.
- Route traffic only to healthy database nodes.
- Prepare the architecture for primary/replica failover.
Components
The stack consists of:
- PostgreSQL nodes —
pg1,pg2,pg3 - HAProxy — routes database traffic and performs health checks
- PgBouncer — connection pooler used by the application
2) Architecture & Traffic Flow
Request flow
Application -> PgBouncer (6432) -> HAProxy (5000) -> PostgreSQL (pg1/pg2/pg3)Flow explanation:
- Your application connects to PgBouncer.
- PgBouncer forwards queries to HAProxy.
- HAProxy routes the traffic to a healthy PostgreSQL node.
This architecture ensures that the application always connects to a single endpoint.
3) Docker Compose Services
PostgreSQL Nodes
The setup includes three PostgreSQL containers with persistent volumes and health checks.
pg1 — Primary Candidate
Configuration highlights:
- Image:
postgres:16 - Port:
5433:5432 - Persistent volume:
pg1_data - Health check using
pg_isready - Initializes database
testdb - Executes
primary/init.sqlduring startup
pg2 and pg3 — Standby Candidates
Additional nodes for replication and failover testing.
pg2→5434:5432pg3→5435:5432
Each container uses its own persistent Docker volume.
Why persistence matters
Using named volumes ensures that database data survives container restarts and docker compose down operations.
Health checks allow dependent services (like HAProxy) to wait until PostgreSQL is fully ready before starting.
4) Primary Initialization
File: primary/init.sql
CREATE ROLE replicator WITH REPLICATION LOGIN PASSWORD 'replica_pass';

ALTER SYSTEM SET wal_level = replica;
ALTER SYSTEM SET max_wal_senders = 10;
ALTER SYSTEM SET hot_standby = on;Purpose of these settings
- replicator role — used for replication connections
- wal_level = replica — enables WAL logging for replication
- max_wal_senders — limits concurrent replication connections
- hot_standby — allows read queries on replicas
These settings prepare the database for replication but do not automatically configure replicas.
5) HAProxy Configuration
HAProxy acts as a TCP load balancer for PostgreSQL connections.
Configuration file:
haproxy/haproxy.cfgWrite Frontend
frontend postgres_write
    bind *:5000
    default_backend primary_db
Creates a stable endpoint for database writes.
Accessible as:
localhost:5000Read Frontend
Read queries can be routed through another frontend:
localhost:5001This allows future separation of read and write traffic.
Service Dependencies
HAProxy waits until PostgreSQL containers are healthy.
depends_on:
  pg1:
    condition: service_healthy
  pg2:
    condition: service_healthy
  pg3:
    condition: service_healthy
This prevents routing traffic before the database is ready.
6) PgBouncer Configuration
PgBouncer acts as the single database entry point for applications.
File:
pgbouncer/pgbouncer.iniConfiguration:
[databases]
testdb = host=haproxy port=5000 dbname=testdb

[pgbouncer]
listen_port = 6432
listen_addr = 0.0.0.0

auth_type = md5
auth_file = /etc/pgbouncer/userlist.txt

pool_mode = transaction
max_client_conn = 100
default_pool_size = 20Why PgBouncer?
PostgreSQL handles a limited number of concurrent connections efficiently.
PgBouncer:
- Maintains a small pool of server connections
- Allows many client connections
- Reuses server connections across transactions
The current configuration uses:
pool_mode = transactionThis is commonly used in API services.
7) How to Connect
Applications should connect only to PgBouncer.
Connection details:
Host: 127.0.0.1
Port: 6432
Database: testdb
User: postgres
Password: postgres
Example DSN:
postgres://postgres:postgres@127.0.0.1:6432/testdbYour application does not need to know about pg1, pg2, or pg3.
8) Testing Failover Behavior
Start the stack:
docker compose up -dConnect through PgBouncer and run a query.
Now stop the primary node:
docker stop pg1HAProxy will route traffic to other healthy PostgreSQL nodes if available.
⚠️ Note: Since replicas are not configured yet, the new node may contain different data.
9) What’s Missing for True Failover
This setup provides connectivity failover, but not automatic database failover.
To build a full HA system you need:
1. Streaming Replication
Replica nodes must follow the primary using:
pg_basebackupprimary_conninfostandby.signal- replication
pg_hba.confrules
2. Role-Aware Routing
HAProxy should route traffic based on database role.
Example check:
pg_is_in_recovery()- Primary →
false - Replica →
true
3. Automatic Leader Promotion
Production systems usually use orchestration tools such as:
- Patroni
- repmgr
- Stolon
These tools manage:
- leader election
- replica promotion
- cluster health
10) Limitations of This Setup
This architecture works well for local testing and learning, but it has some limitations.
Manual Failover
If the primary fails, another node must be manually promoted.
No Automatic Replication
Standby nodes currently run as independent databases.
Data Consistency Risks
Without replication, switching nodes can lead to inconsistent data states.
Single Point of Failure
Both HAProxy and PgBouncer are single containers. If either crashes, the database becomes unreachable.
PgBouncer Transaction Mode
Using:
pool_mode = transactionmeans session-level features like temporary tables are not supported.
Conclusion
This Docker Compose setup provides a solid foundation for PostgreSQL high availability experiments.
It demonstrates how to combine:
- PostgreSQL nodes
- HAProxy
- PgBouncer
- Docker Compose
to create a stable database endpoint with connection pooling and health-based routing.
The next step toward production-ready high availability would be integrating automatic replication and leader election tools such as Patroni.